Edge Routing Sled: Making Routing Safer and Easier
- chazpainter0
- Oct 8, 2021
- 4 min read
Hello. Today I wanted to write a little about this jig that I made while working on a kitchen's worth of cabinet doors. As this was not my first time making raised panel doors, I began thinking about ways that would make this process safer as easier. The main thing I was trying to avoid is the router bit being pulled the over the end grain of the work piece and ruining the end of the board. I also wanted to be able to keep my hands far enough away from the piece, because raised panel bits are bigger and more dangerous than your standard profile bits. These two things really told me that I needed to have some type of clamping bar that holds the piece down, but the sled also needs to be fairly wide so that my hands could be far enough away. I also needed to make it to where the clamping bar could move that way I can rout different widths of wood. So, now the clamping bar needed to be on T-Track so that it could move on the sled. After establishing these ideas, all that really had to be done was figuring out how to make this clamping bar work.
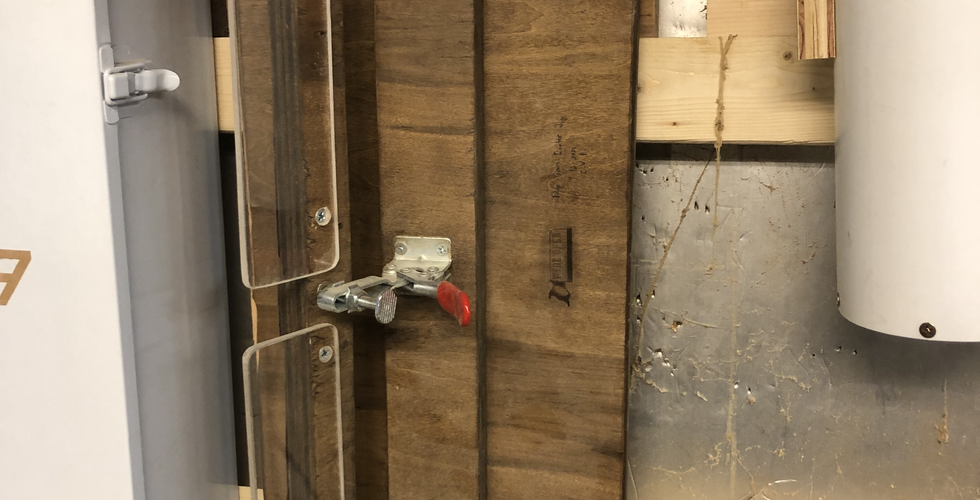
For the clamping bar I decided that I would use multiple toggle clamps working in unison. I chose to use these because they are easy to use and fairly cheap on Amazon. One side of the toggle clamp gets attached to a piece of plywood that moves in the T-Track and the other side attaches to the actual clamping bar. The only really tricky part of this whole process is how you connect the clamping bar to each of the toggle clamps. The way I went about this was to use threaded inserts in the clamping bar, and align them with bolts in the toggle clamps. I say this part is the most tricky because if the bolts in the toggle clamps don't line up perfectly with the threaded inserts then the clamping action won't work. Altogether though it went rather smoothly for me.
The rest of the build process is fairly simple. The T-Tracks are dado'd into the sled body at whatever distance from the side you prefer, as long as both sides are the same distance. Then, you'll just have to drill holes for the T-Bolts to go through the bottom piece of the clamp bar. making sure that these holes align with the T-Tracks. Then you could put your handles on. This can be done in many different ways, but I made it a little bit harder on myself. I decided to turn my own handles so that they would be large and comfortable enough for my hands. I then drilled holes in the bottom of my handles so that I could put a threaded insert in them. I then counter bored a hole in the bottom of the sled so that I could use a bolt to attach the handles to the sled.
Now, this would be considered done for most and would function well, but I decide to add a few more features to mine to make it a little nicer to use. The first thing that I did was use a ruler and mark out inch and half inch increments on both sides of the sled. I then took a palm router with a v-bit and engraved those increments into the sled. This feature allows me to set the clamping bar to the same spot on both ends of the sled. The next feature that I added was pieces of 1/4 inch plexiglass to the clamp bar. My idea for these was to be chip deflectors, but I soon realized that these are only effective when you are routing very thin pieces. Another thing that I added to the clamping bar was some leather to clamping surface. This increases the friction between the clamp and the piece, making the clamp hold slightly better. Finally, I drilled two small holes into the sled base so that I could attach it to a French cleat while its not in use.
I then went on to add some stain to the sled, because I feel a more satisfied with my hand made tools when they are finished in some way. That's just me though and it would work just fine without being stained. As far as the dimensions for this sled it is really based on what you have. I made the dimensions of my sled to where they would work best with my router table. I think it ended up being 20 inches wide by 8 inches deep. For materials I just used scrap plywood that I had laying around. Lastly, I think I only had about $20 worth of materials in the sled and about 1 hour and 30 minutes worth of time in the sled. That is including the time to turn the handles. I think this was well worth it! It made the routing process feel so much safer and I only had issues with grabbing once and that was my fault as I didn't have the jig set up properly. So, I think if you are about to do a lot of edge routing building something like this would be worth your while, as there really isn't anything quite like this on the market!
Thank you all for reading!
Chaz Painter


Comments